
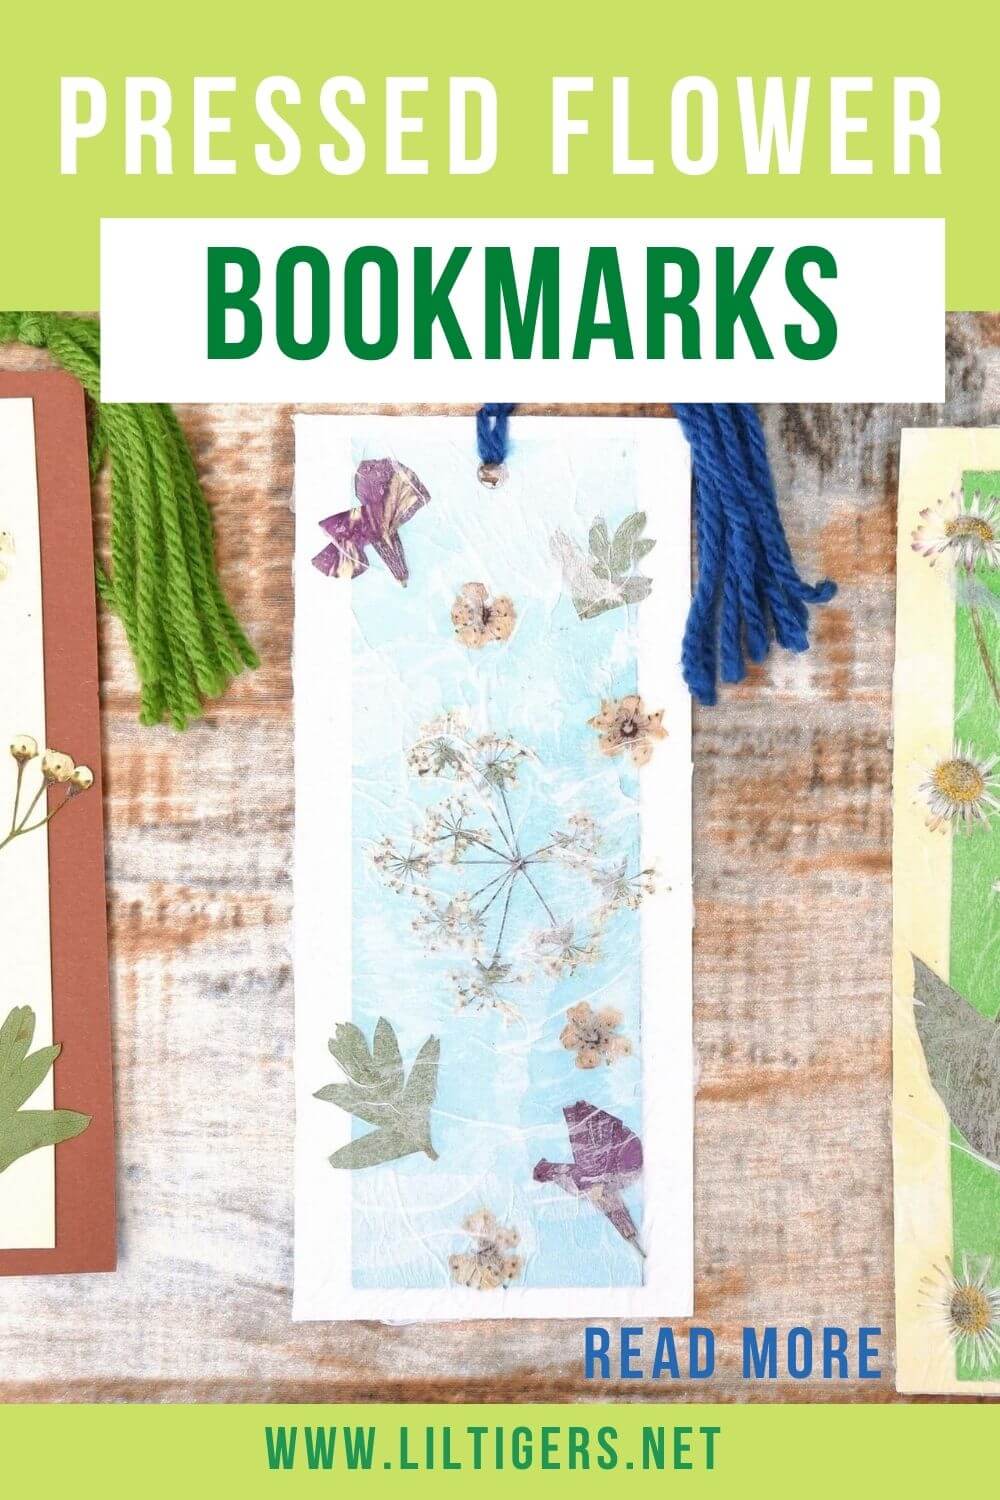
Are you looking for an easy DIY pressed flower art project that you like to read? Then try to make these adorable pressed flower bookmarks and watch our video tutorial below.
They are super easy to make and make the perfect gift for book lovers! Let’s dive right in.

Pressed Flower Art
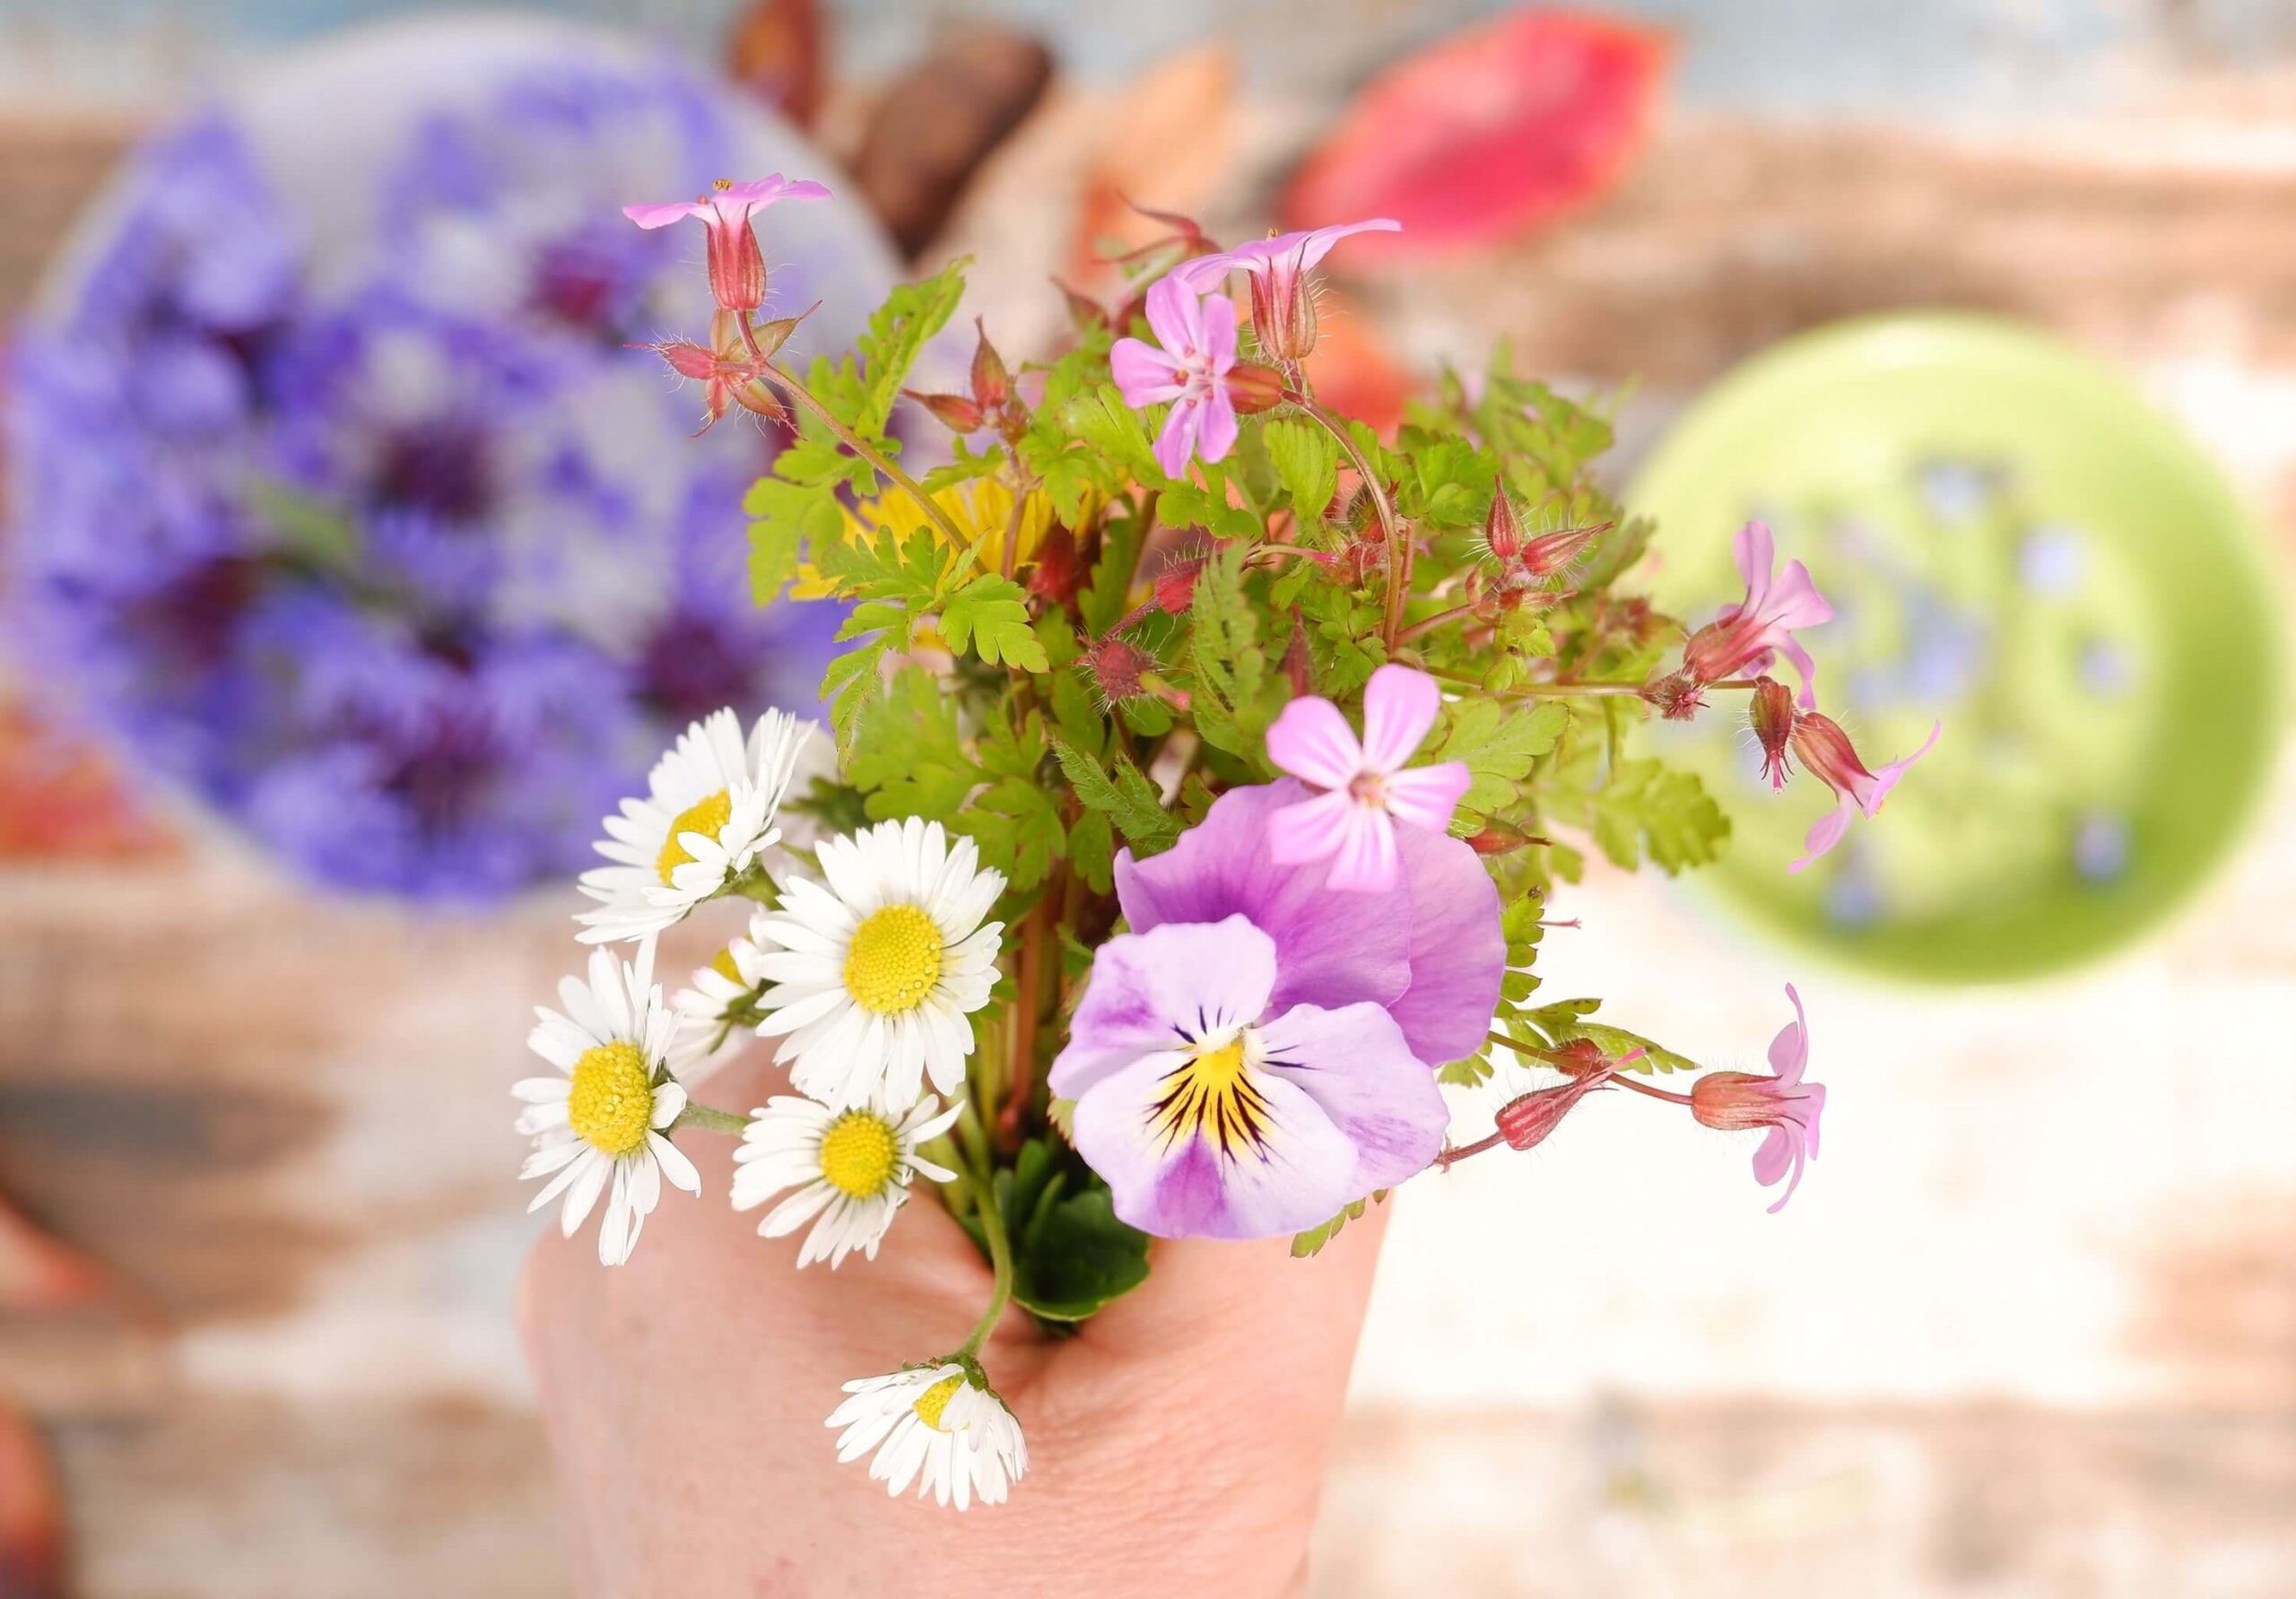
Pressing flowers is super easy and a fun project. You can collect your flowers on a walk, purchase them in a store, or even save them for a special event like a wedding, baby shower, or birthday.
Simply follow our step-by-step instructions and find out how to make pressed flower bookmarks. With our tips, you will have the most aesthetic dried flower bookmarks for sure!
How Long Does it Take to Press Flowers?
Pressing flowers can be a waiting game. Depending on the flowers it can take between 1 week and up to a month for them to dry. So please make sure not to use a book you will need in the near future.
How to Make Pressed Flower Bookmarks
Let’s take a look now at these stunning DIY pressed flower art bookmarks. Here is what you will need for your dried flower bookmarks:
Pressed Flower Bookmark Materials
- cereal box
- pressed flowers
- pressed leaves
- baking paper
- colored paper
- wool yarn
- white paper towels or tissue paper
Tools
- books
- scissors
- white glue
- glue stick
- ruler
- pencil
- brush
- hole puncher
Pressed Flower Bookmark Instructions
These step-by-step instructions are here to help you visualize how to make pressed flower art bookmarks. Please scroll down to simply print out the instructions!
Step 1: Pick flowers
The next time you go for a walk, pick some flowers. Be advised thick multi-layered flowers like roses are harder to press.
Step 2: Prepare flowers
Use a scissor or sharp knife to cut the desired length of the stems.
In case you do not have time to press them right away, place the flowers in the refrigerator to keep them fresh for up to 2-3 days.
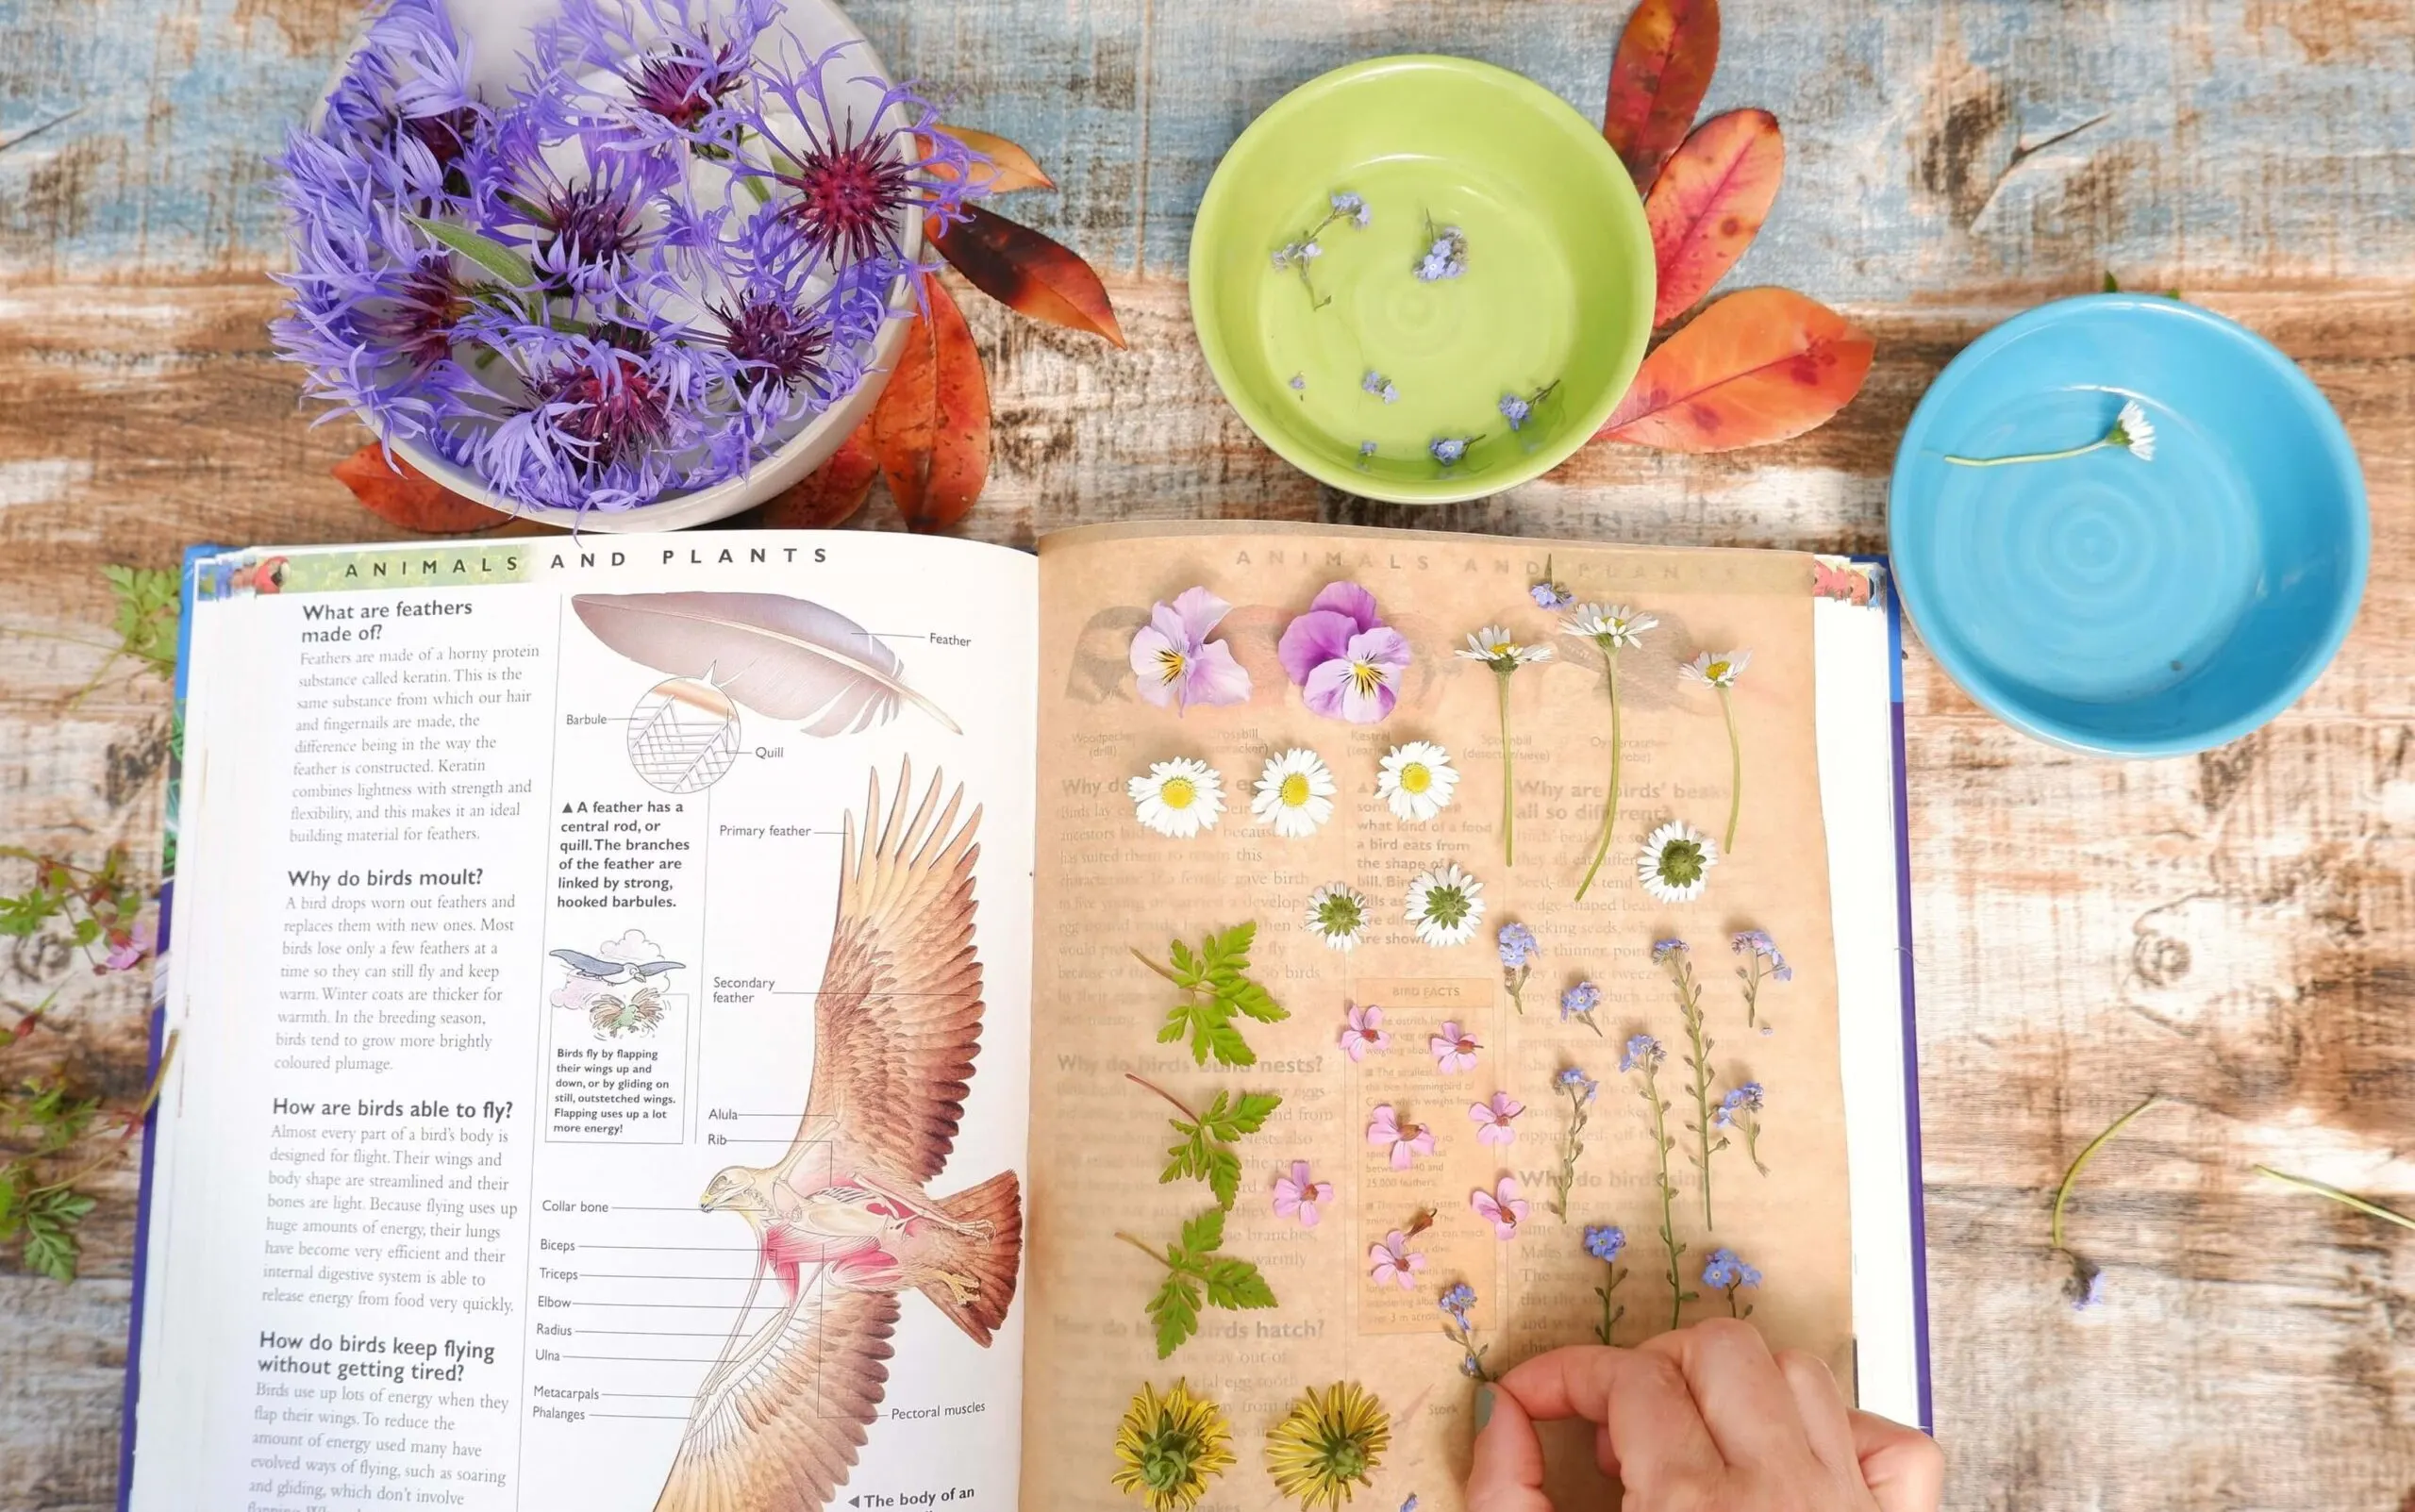
Step 3: How to press flowers
Be advised that there are different techniques on how to press flowers. We used books for our dry flower art.
Place your prepared flowers between 2 sheets of parchment paper. Make sure to arrange your flowers on the baking paper the way you want them to dry.
The paper will absorb excess moisture from the flowers as they dry out and prevent your book from being ruined. If you do not have baking paper at home you can use coffee filters instead.
Next, you take a large thick book and place your prepared sheets carefully in the middle. Take some extra books and stock them on top for extra weight.
Our flowers needed a little over one week to dry fully but it all depends on the flowers you pick. The thicker the flowers are the longer it will take!

While you’re here, also be sure to check out our new Camping Crafts, Smore’s Template, and Fall Sensory Bin Ideas.
Step 4: Cut your bookmarks
Now it is time to cut your paper. For our flower bookmark DIY we used 7×16 cm (2,75 x 6,29 inches)and 5×15 cm (1,96 x 5,9 inches).
The size of the bookmarks is flexible. Just make sure not to cut them too big otherwise they will stick out of your books.
With the help of a ruler and pencil, you can draw your bookmarks on paper and cut them out.
You will need one 7x16cm piece out of an old cereal box. It will help you to stabilize your natural bookmarks.
Of course, you simply can use thicker colored paper but we like to work with recycled materials for our craft projects.
Afterward, cut two more 7x16cm pieces out of colored paper and one in 5x15cm preferably in a different color.
Then glue the pieces with your glue stick together.


Step 5: Make a hole
Now it is time to make a hole with your hole puncher on the top of your paper.
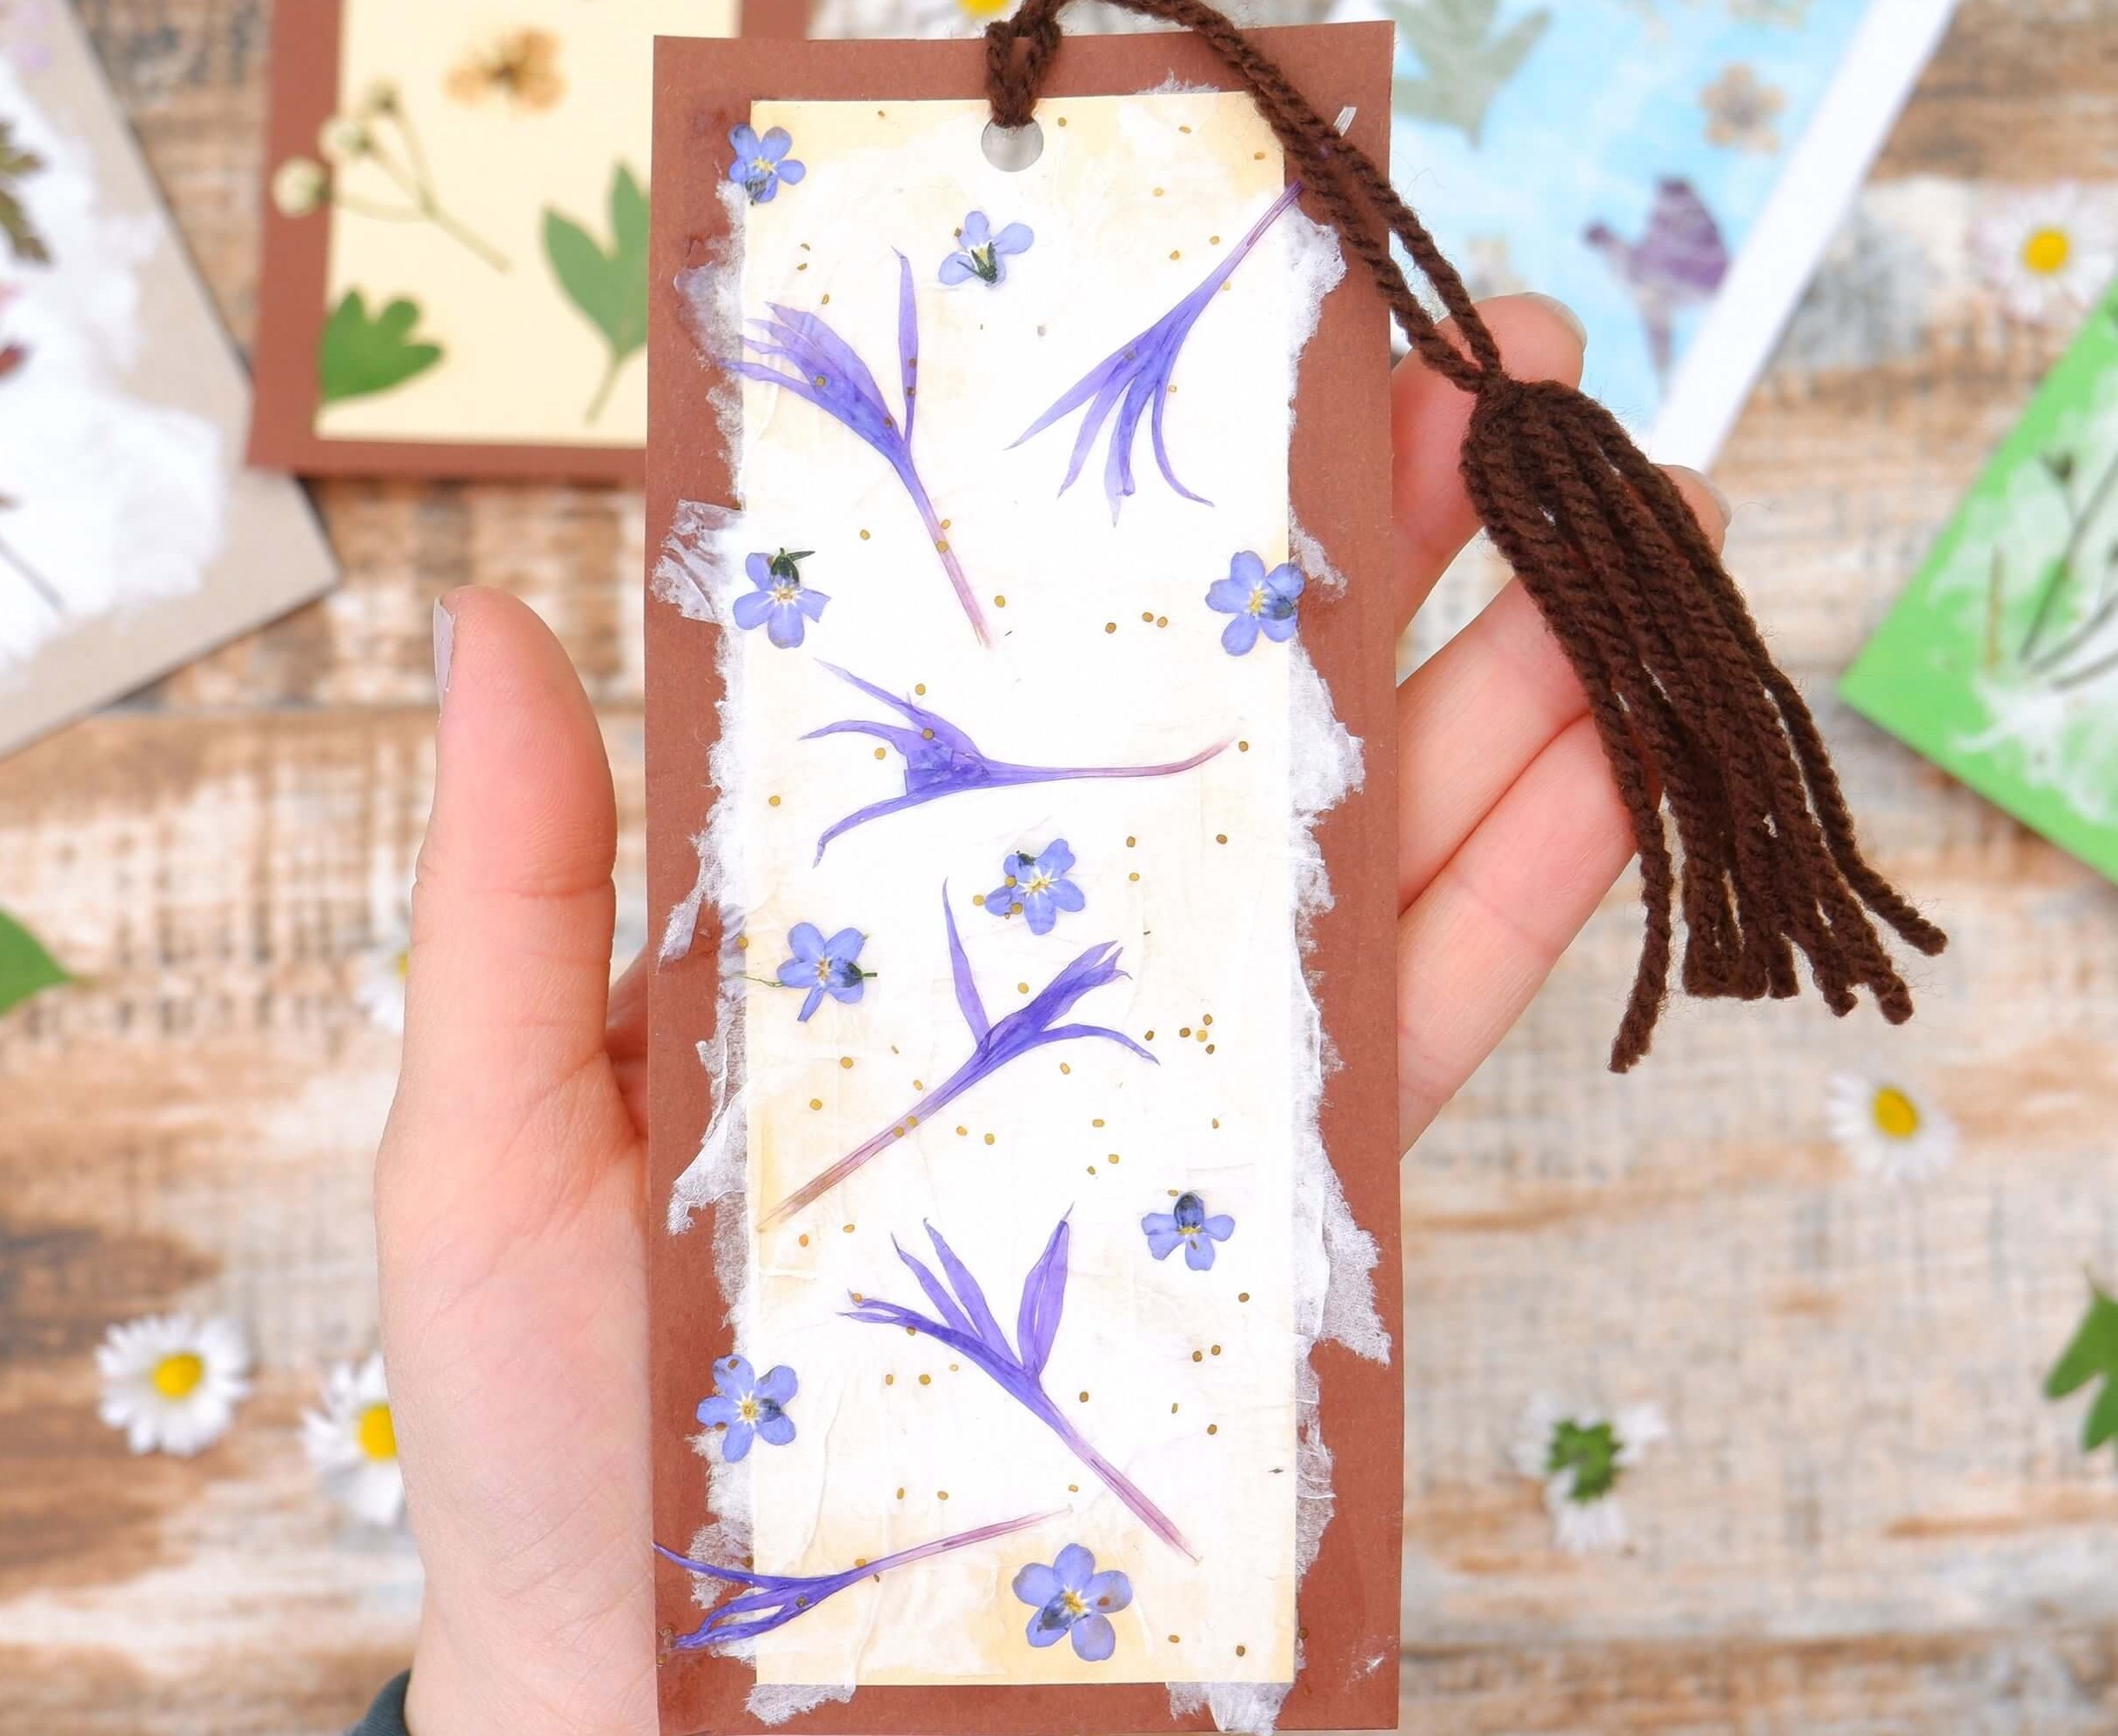
Step 6: Design your dried flowers bookmark
Pressed flowers are delicate. Place them carefully on your prepared paper to create your design.
You might consider using a squeezer to arrange your dried flower art.
This pressed flower bookmark project is the perfect excuse to go for a walk in nature.
Being outside is so important for kids and comes with so many benefits. Go check them out here.
You do not get your children outside? Do not worry, here are some fun ways to Engage Children in Nature.
Step 7: Glue your flowers
Apply now your white glue to the backside of your flowers. Make sure to use a brush. Then stick your flowers carefully onto the paper.
If you like to switch your flower pressed bookmarks up a little bit use white paper towels and either attach them under or over the flowers for a nice touch.
In our video tutorial, you can see the different steps.


Step 8: Let it try
After you glue the flowers onto the paper make sure to avoid moving them again. Let the dried flowers dry for a couple of minutes up to an hour.
Are you interested in more kid’s activities, arts & crafts, and science experiments?
I have made it easy for you! Simply join our newsletter now and I will send you new fun for kids.
Subscribe for free
Step 9: Add yarn ribbons
This step is optional but super cute, make your own ribbon out of yarn and attach it through the hole to your bookmark.
All you need to do is cut several pieces of yarn with a length of 15cm. Then tie them up nicely and attach them to your DIY pressed flower artwork.
The instructions for the ribbon can be found in the video tutorial below.

How to Make Dried Flower Bookmarks Tips
- To make your bookmark flowers more sturdy simply laminate your finished product.
- Use the chance and make more than one at the same time. They make an adorable gift for book lovers and special occasions.
Pressed Flower Bookmark Video Tutorial
If you are a visual person, take a look at our full here.
Pin this How to Make Pressed Flower Bookmarks Tutorial
Don’t forget to save this flower art project on Pinterest for later! Be sure you are following along with Lil Tigers.
Co-Creator
For these adorable pressed flower bookmarks, I had help from Zoe Violette.
Zoe is a mum full-time, artist, and content creator with passion. With her YouTube channel, she tries to combine her love for handcraft with her passion for nature.
She loves to recycle materials and turn them into art and craft projects for children.
She helped me create this wonderful project and was in charge of all the photographs and video inputs.
Please show her some love by visiting her social media channels and taking a look at what she has in store for your next rainy-day project!
YouTube: https://www.youtube.com/channel/UCjXkSgFfUga0fUqLhheselg?view_as=subscriber
Facebook: https://www.facebook.com/RecyclingArt4Kids
Instagram: https://www.instagram.com/recyclingartforkids/
Now I would like to hear from you!
How did you enjoy this easily pressed flower bookmark DIY?
Either way, let me know by leaving a comment below right now.
I’d love to hear from you!
How to Make Pressed Flower Bookmarks - DIY Pressed Flower Art


Learn how to make your own pressed flower bookmarks.
Materials
- cereal box
- pressed flowers
- pressed leaves
- baking paper
- colored pape
- wool yarn
- white paper towels or tissue paper
Tools
- books
- scissors
- white glue
- glue stick
- ruler
- pencil
- brush
- hole puncher
Instructions
- Pick Flowers. Be advised thick multi layered flowers like roses are harder to press.
- Use a scissor or sharp knife to cut the desired length of the stems. In case you do not have time to press them right away, put the flowers in the refrigerator to keep them fresh for up to 2-3 days.
- Now place your prepared flowers between 2 sheets of parchment paper. Next you take a large thick book and put your prepared sheets carefully in the middle. Take some extra books and stock them on top for extra weight.
- Wait till your flowers are dried. That might take up to several weeks.
- Cut your bookmarks. For our flower bookmark DIY we used 7x16 cm (2,75 x 6,29 inches) and 5x15 cm(1,96 x 5,9 inches). You will need one 7x16cm piece out of an old cereal box and two more 7x16cm pieces out of colored paper and one in 5x15cm preferable in a different color. Then glue them together.
- Make a hole with your hole puncher in the top of your paper.
- It is time to design your bookmarks. Place them carefully on your prepared paper to create your design.
- Take your liquid glue and attach the flowers to the bookmark.
- Let the dried flowers dry for a couple of minutes up to an hour.
- Add yarn ribbons. This step is optional but super cute, make your own ribbon out of yarn and attach them through the whole to your bookmark.
- Your flower art project is finally done. Now it is time to read a book.