
Do your kids enjoy playing with mud? Then try this DIY Clay Rocket Stove Project with them and teach your kids about fire!
With help of two old aluminum cans, you can make your own popcorn or chocolate delights.
Let’s find out more.

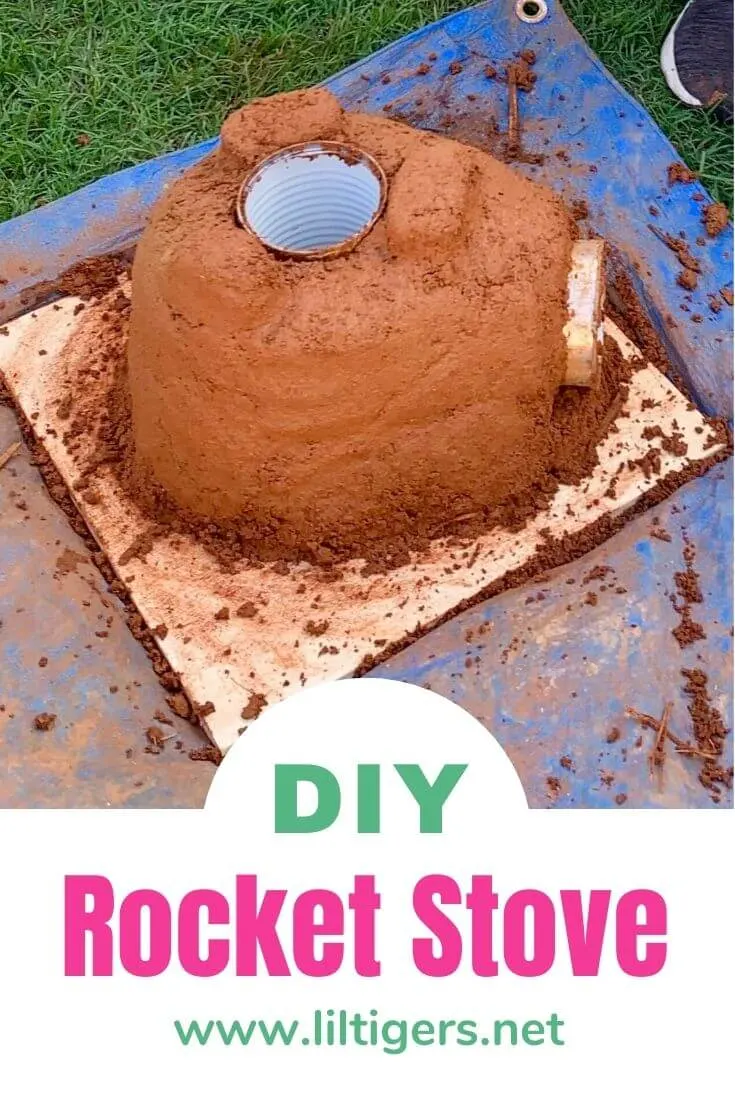
How to Make a Clay Rocket Stove
The name is as exciting as the product, the rocket stove!
Rocket stoves are an excellent way to teach children about fire, energy, and survival skills.
A rocket stove is different from other stoves as it uses less wood. Using less wood means reducing the smoke and harmful emissions going into the atmosphere. Most importantly, more trees are kept in the forest!
It makes good eco-sense too.
Now you don’t need expensive materials to make rocket stoves.
Ingredients are simple:
Clay Rocket Stove Materials
- clay soil
- sand
- water
- small wooden plank to hold the stove whilst drying
- two aluminum cans
Rocket Stove Instruction
These step-by-step instructions are here to help you visualize how to make this fun DIY clay rocket stove. Please scroll down to simply print out the instructions!
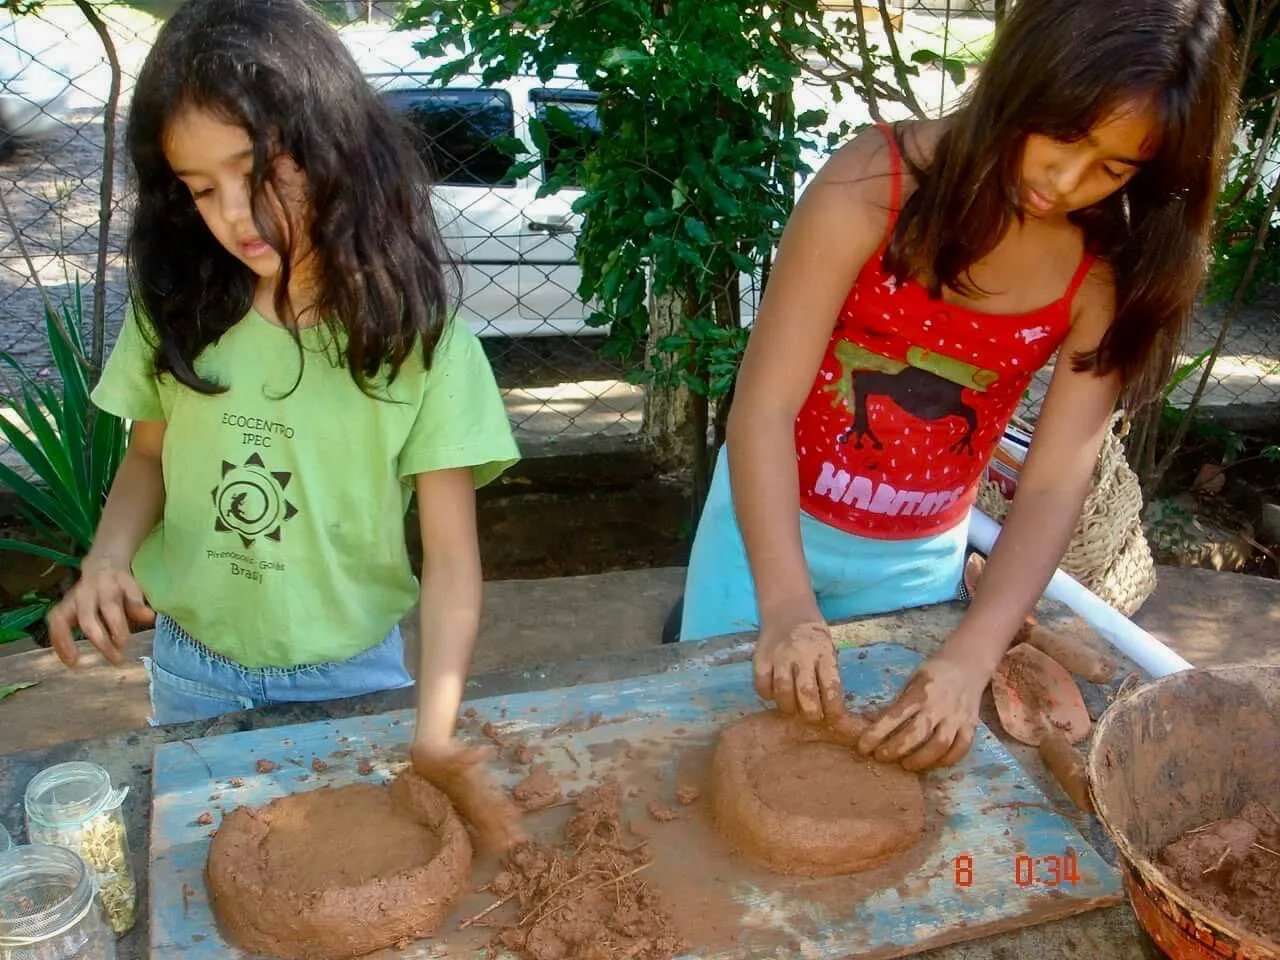
Step 1: Mix your own clay
Add water to the clay. Feel the texture. The mixture must have at least 20% clay.
If the clay is too stiff, add a small portion of sand. Keep adding sand and mixing until the clay mixture is malleable and easy to mold. If the mixture is too difficult for children to mix by hand, why not try mixing with feet?
Option: If you do not have access to clay and sand, you can purchase fire clay from hardware stores.
Here is the short video of how the kids mixed the clay with their feet: https://youtu.be/MybsG9hrF74
Are you interested in more kid’s activities, arts & crafts, and science experiments?
I have made it easy for you! Simply join our newsletter now and I will send you new fun for kids.
Subscribe for free
Step 2: Make the clay foundation
Place a handful of clay mixture onto the wooden square. Mold the clay into a round base of approximately 2-3 cm.

Step 3: Position the cans
Position an aluminum can so it sits vertically on the clay base. Then position the other aluminum can horizontally.
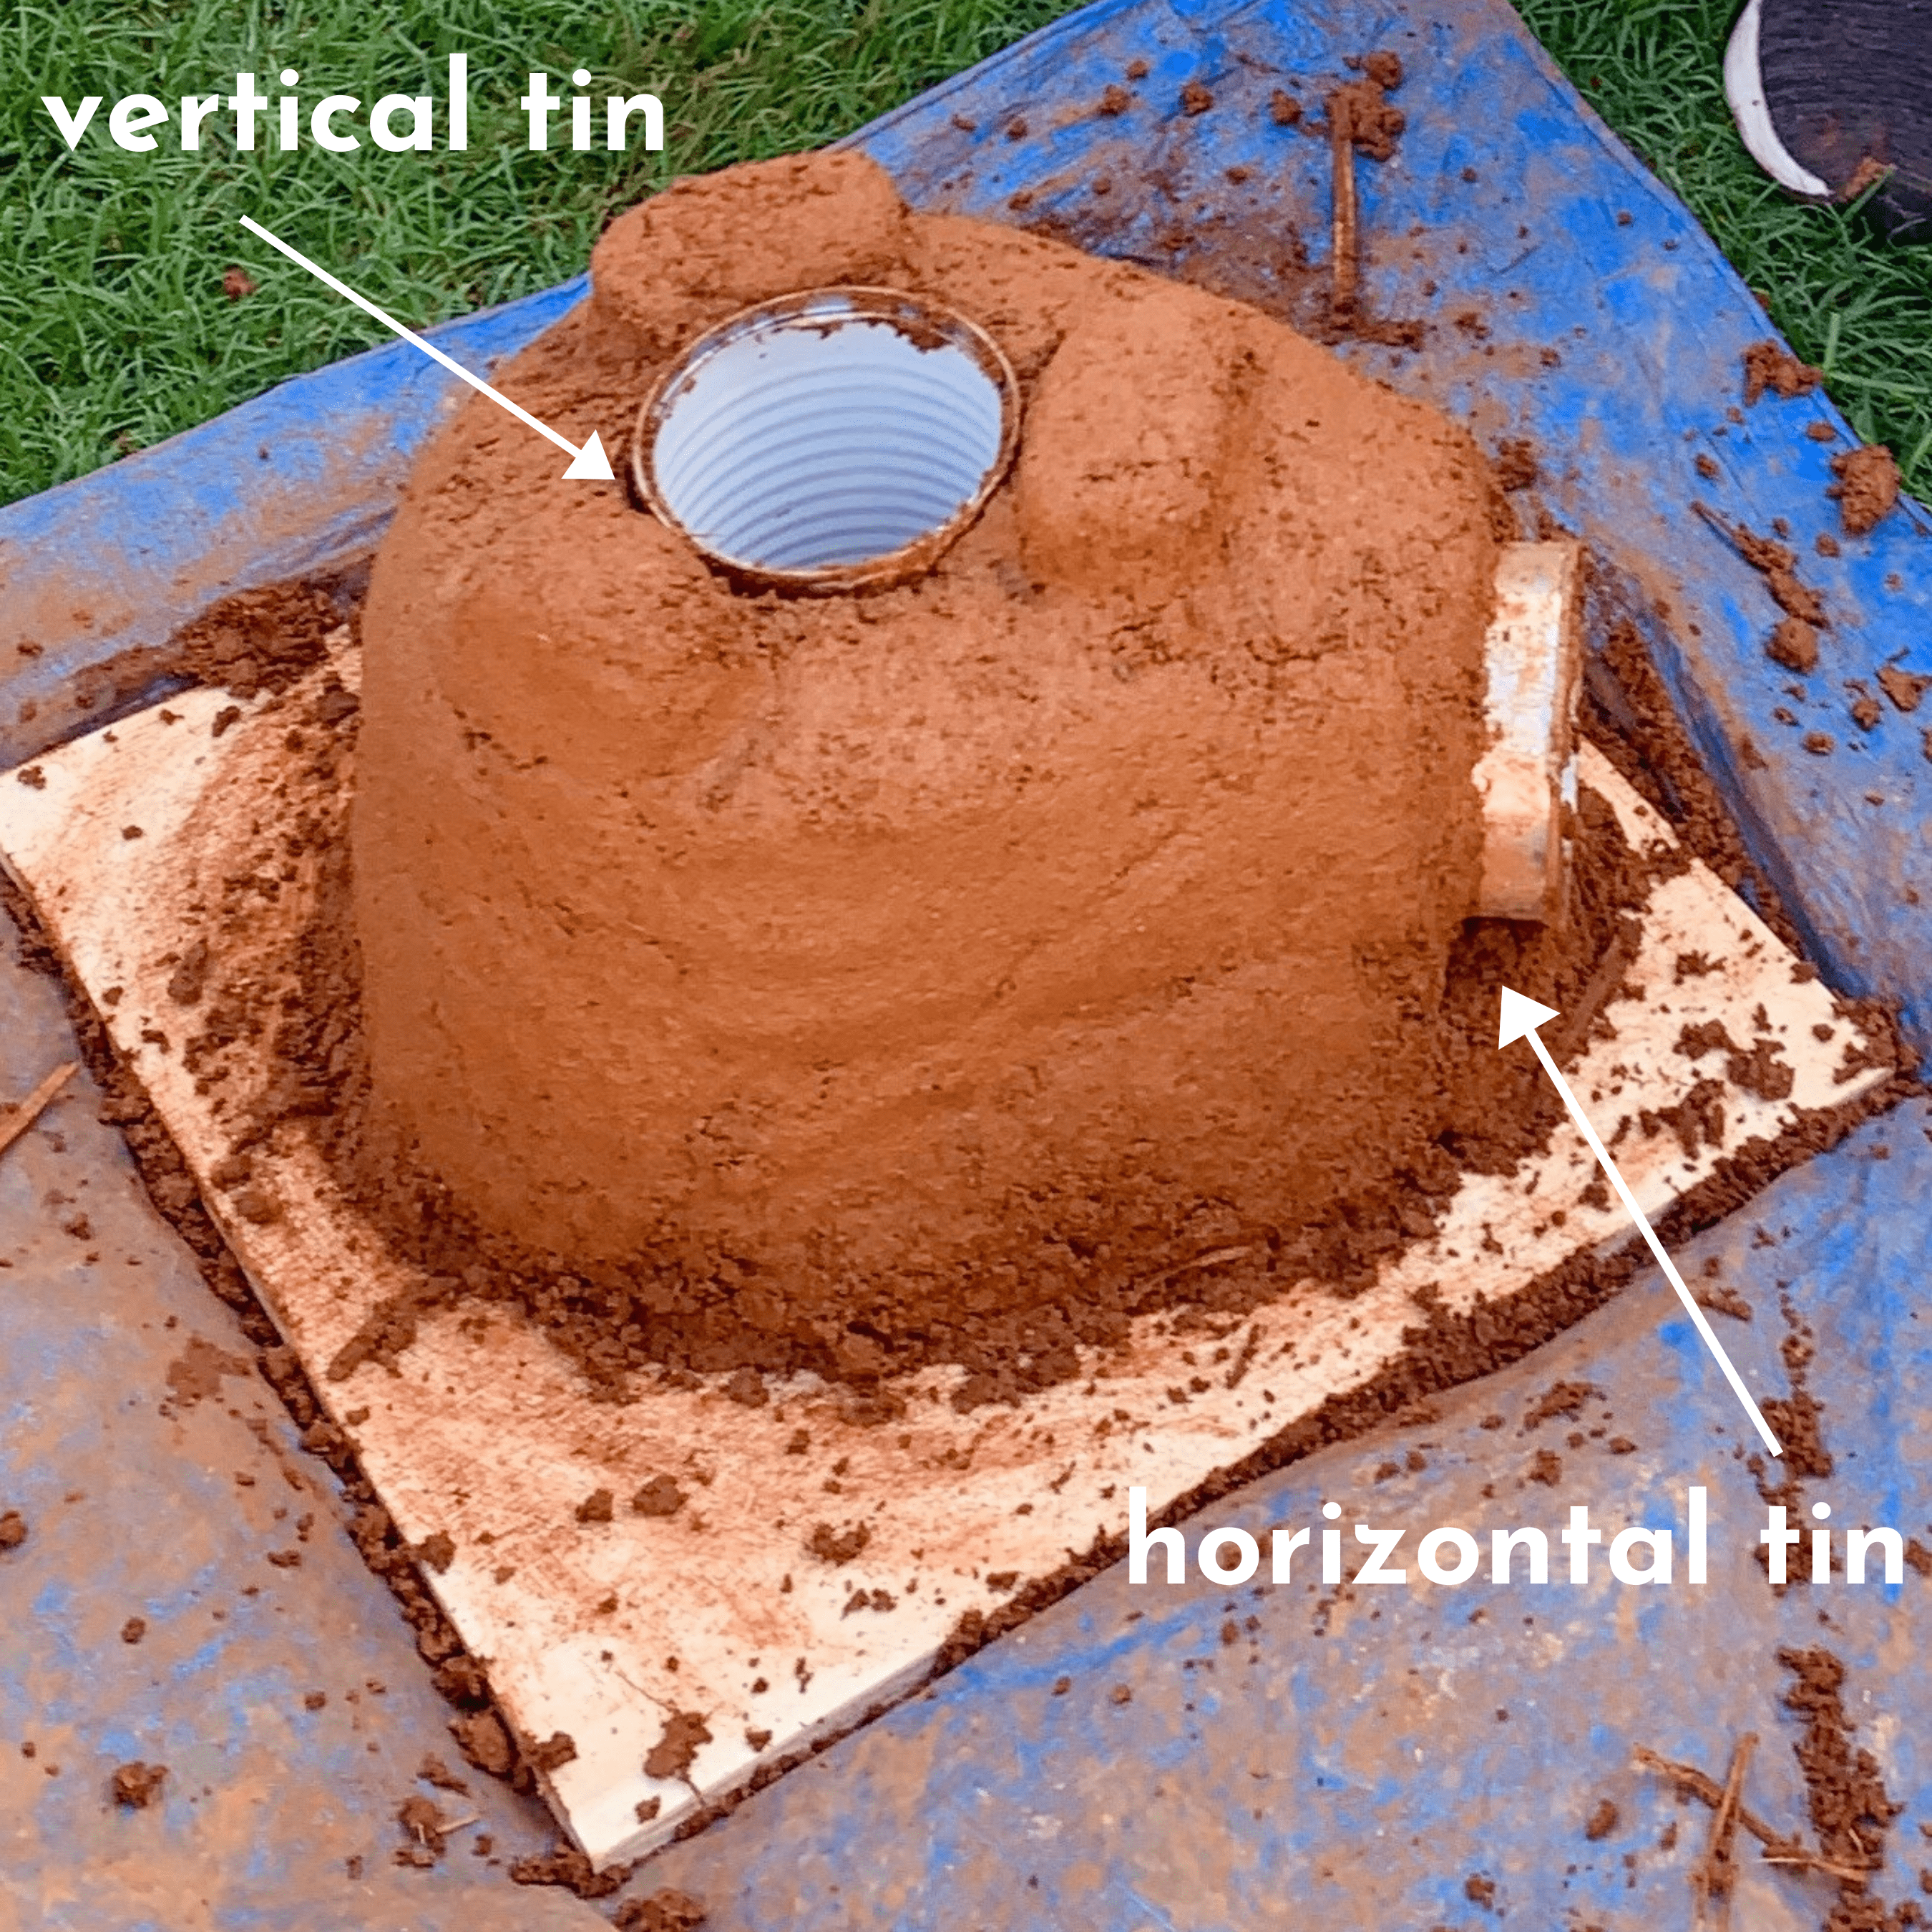

Step 4: Secure your mud stove design
Securing the cans in position, use clay to mold around the cans. Keep molding until the cans are enclosed.
Step 5: Make Ridges
Make little ridges at the top of the rocket stove to support a pot as shown in the picture above.
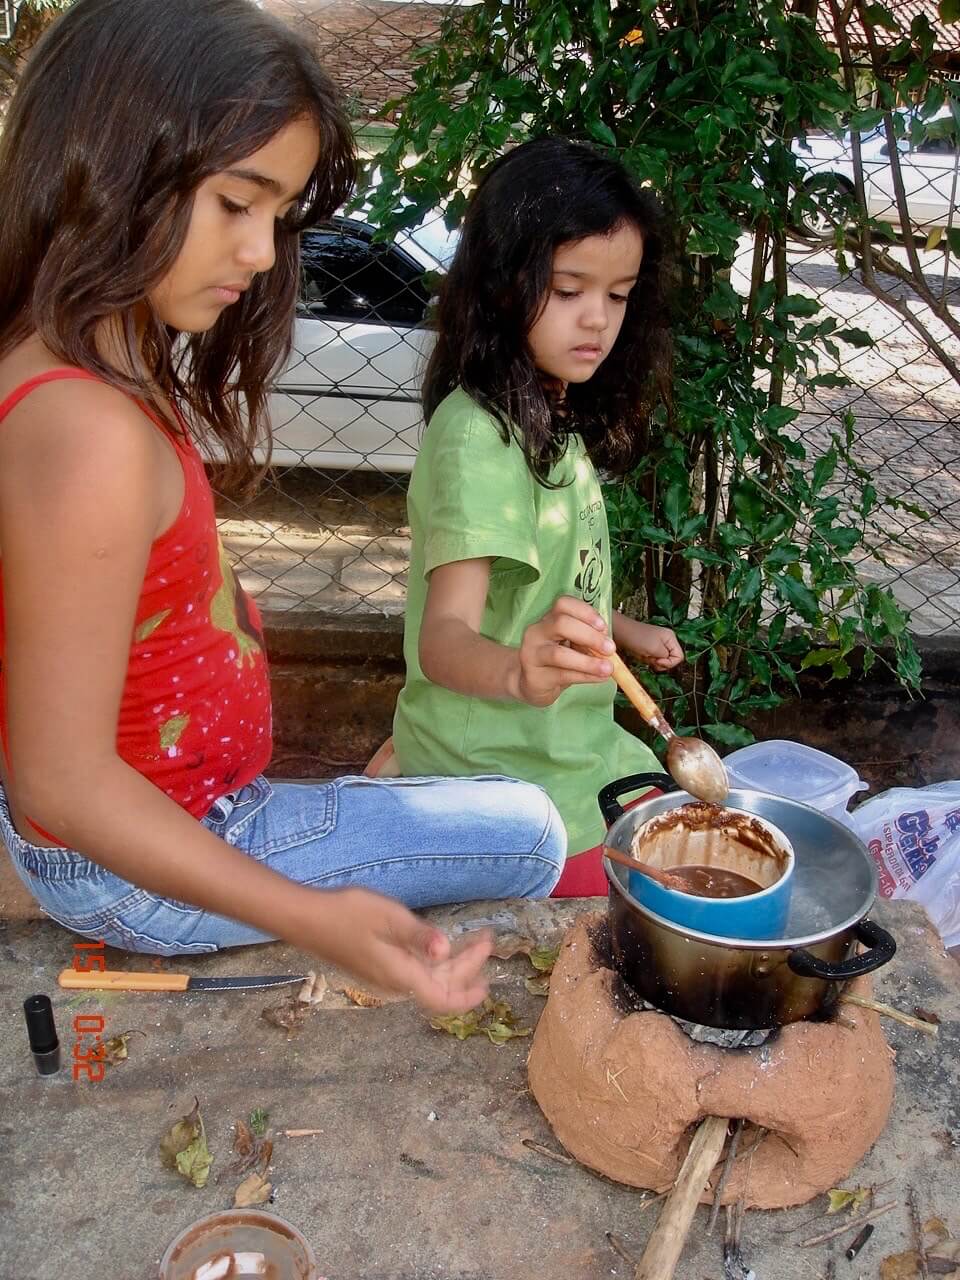
Step 6: Start Cooking
Once the clay has started to dry, gently remove the cans. Remove the wooden base from the rocket stove.
Now it’s time to experiment!
You can start a small fire from the top of the stove. Once the fire has begun, you can start feeding the rocket stove from the horizontal opening.
Please be advised that this activity is for children aged 8+ under supervision!

Did your kids enjoy this outdoor mud kitchen project? Then try one of our other fun hands-on activities for kids. How about our DIY Foil Stream, our Paint Filled Egg Art Project, or Summer Activities for Kids.
About the Author


Lucy Legan is the author of Planet Schooling – How to create a permaculture living laboratory in your backyard. You can find the book here: planetschooling.com
The Planet Schooling crew is dedicated to supporting parents, educators, and teachers with skills, resources, and materials to co-create a greener future, with children — fast-tracking local resilience.
Facebook: Planet Schooling and Lucy Legan
https://www.facebook.com/PlanetSchooling
Instagram: Planet Schooling and Lucy Legan
https://www.instagram.com/planetschooling/
Buy the book here: https://planetschooling.com/product/preorder-planet-schooling-book/


Pin this Clay Stove DIY
Be sure you are following along with Lil Tigers and don’t forget to save this mud stove design on Pinterest for later!
Being outside is so important for kids and comes with so many benefits. Go check them out here.
You do not get your children outside? Do not worry, here are some fun ways to Engage Children in Nature.
Now I would like to hear from you!
How did your kids enjoy this messy mud play project?
Either way, let me know by leaving a comment below right now.
I’d love to hear from you!
How to Make a Clay Rocket Stove
How to Make a Clay Rocket Stove
Please be advised that this activity
Materials
- clay soil
- sand
- water
- small wooden plank to hold the stove whilst drying
- two aluminium cans
Instructions
- Add water to the clay. Feel the texture. The mixture must have at least 20% clay.
- Place a handful of clay mixture onto the wooden square. Mold the clay into a round base of approximately 2-3 cm
- Position an aluminum can so it sits vertically on the clay base. Then position the other aluminum can horizontally.
- Securing the cans in position, use clay to mold around the cans. Keep molding until the cans are enclosed.
- Make little ridges at the top of the rocket stove to support a pot as shown on the picture above.
- Once the clay has started to dry, gently remove the cans. Remove the wooden base from the rocket stove.